In order to edit any Visual Basic macros, you first must add a way to access Visual Basic in Microsoft Word. To do this, do the following:
- Add the Developer Tab: in Word, go to File - Options - Customize Ribbon, check the Developer button, and OK.
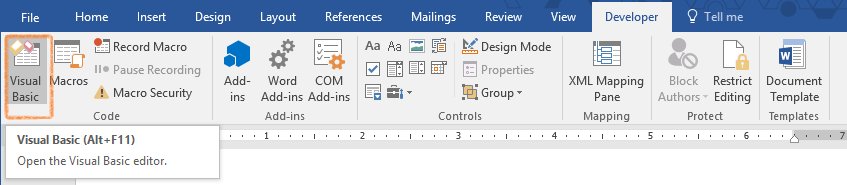
- Open Visual Basic: click on the Developer tab on the Ribbon located at the top of the screen, then select Visual Basic.
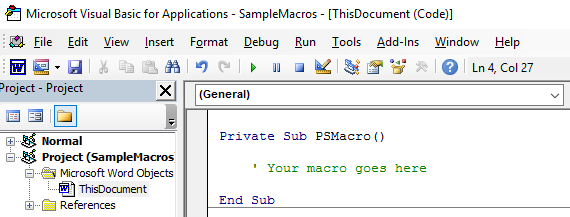
- Create Your Macro: open Visual Basic. Start your macro with Private Sub PSMacro() in the first line. PSMacro is the name of this example macro; this can be changed to whatever name you like.
- End Your Macro: to end your macro, type End Sub.
Various Word items can be referenced in Macros. The following examples demonstrate how to reference an item.
- Merge Fields: to reference a Merge Field, your command will be
ActiveDocument.MailMerge.DataSource.DataFields("SampleMergeField")
The name of the Merge Field can be found in the drop-down list that displays upon clicking on Mailings > Insert Merge Field
- Form Fields: for Form Fields such as Checkboxes, your command will be
ActiveDocument.FormFields("SampleBox").CheckBox.Value
You can name a specific Checkbox by right-clicking on it in Word, and selecting Properties. Changing the text field next to Bookmark will rename the Checkbox, which you can then reference in your Macro.
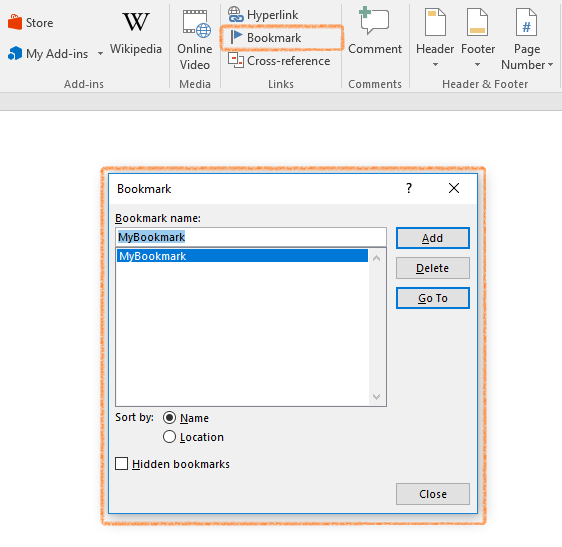
- Bookmarks: to reference a location or range in your document, your command will be
ActiveDocument.Bookmarks("MiddleInitial").Range.Text
You can change the name by clicking onInsert - Bookmark. Name your bookmark and click on Add.
Often when displaying information from a DB Precision export, such information is displayed in a Word Table. There may be instances where you want to hide a row within one of these tables or even hide the entire table. When this is the case, you can create a macro in Word that will hide or show a table or one or more rows within a table. To do this, do the following:
- Hide a Table: to hide the first table, your command would be the following:
ActiveDocument.Tables(1).Range.Font.Hidden = True.
Note that the "1" in parenthesis after Tables indicates which table within the document is being hidden where "1" indicates the first table. For example, if you are hiding the second table of your document, replace the "1" with "2".
- Hide a Row of a Table: to hide the second row of the first table, your command would be:
ActiveDocument.Tables(1).Rows(2).Range.Font.Hidden = True.
If you are hiding the third row of the first table of your document, replace the "2" with "3", and so on.
- Showing Hidden Items: you may choose to create a second macro that shows all items that were previously hidden. To do so, create a macro as described above, while changing the end of your command(s) from True to False. You will also need to choose a new name for your macro ("ShowAll" for example).
Any range in a Word Document can be hidden or shown using Macros. To do this, you can create a Bookmark, which is simply a named range or location within a Word Document. To hide or show a bookmarked range, do the following:
- Hide Bookmark: to hide your bookmark, your command will be
ActiveDocument.Bookmarks("MyBookmark").Range.Font.Hidden = True
- Showing Hidden Items: you may choose to create a second macro that shows all items that were previously hidden. To do so, create a macro as described above, while changing the end of your command(s) from True to False. You will also need to choose a new name for your macro ("ShowAll" for example).
